
Creating your organisation
Overview
Creating an organisation sets up a dedicated Twake workspace for your company. The process has two parts: creating the organisation itself, then creating the Owner account — your professional account linked to that organisation.
Prerequisites
- A personal Twake account on twake.app. If you don't have one yet, create it before proceeding.
- The domain name you want to use (e.g.
yourcompany.com). You'll need access to its DNS settings later to verify it.
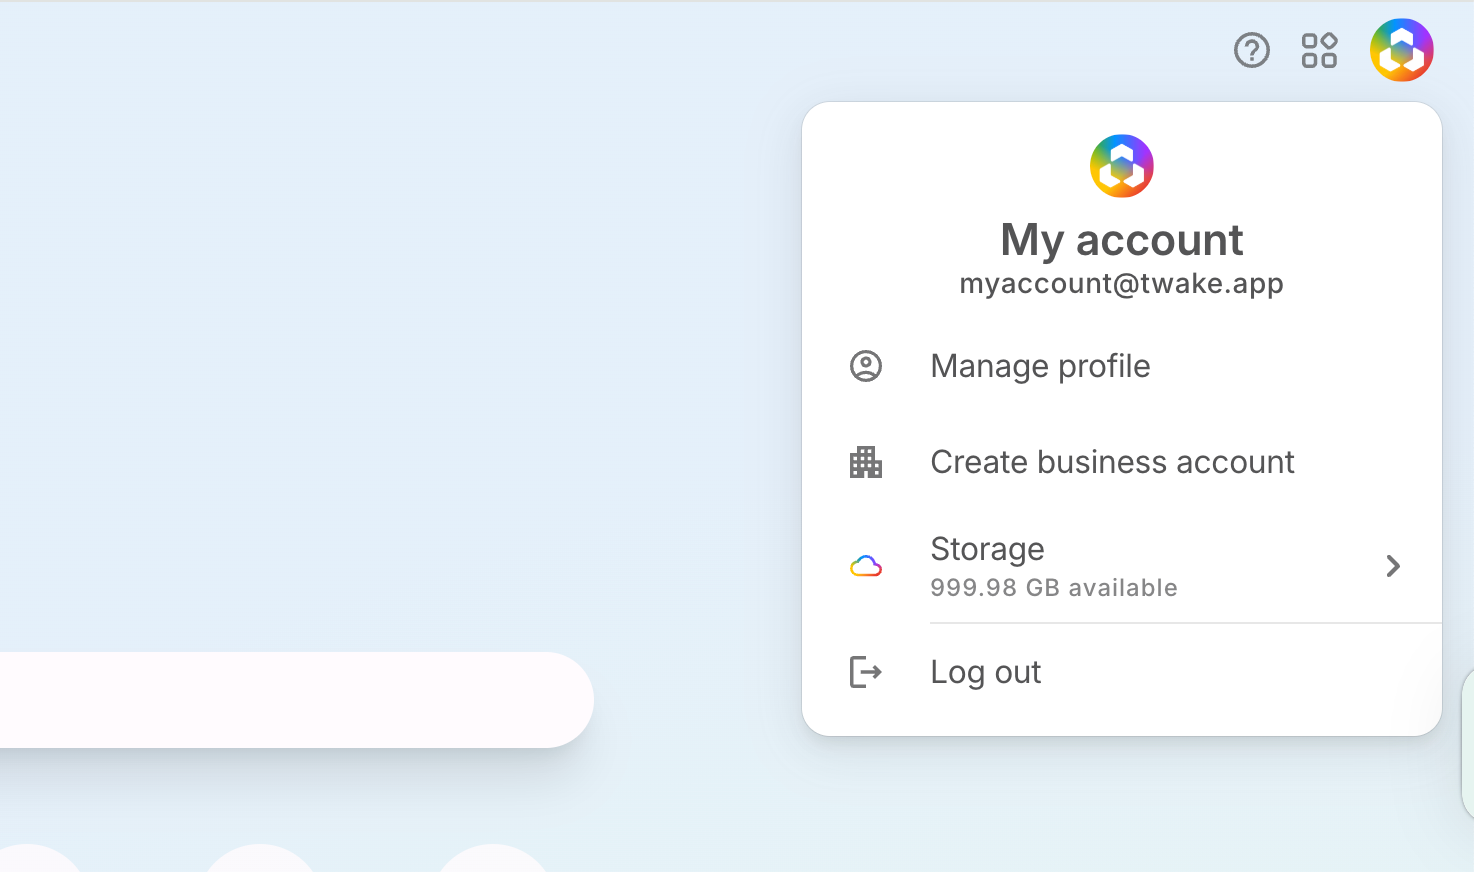
Step 1 — Start organisation creation
- Sign in to your personal Twake account.
- Click the settings menu (your profile icon, top right).
- Click Create business account.
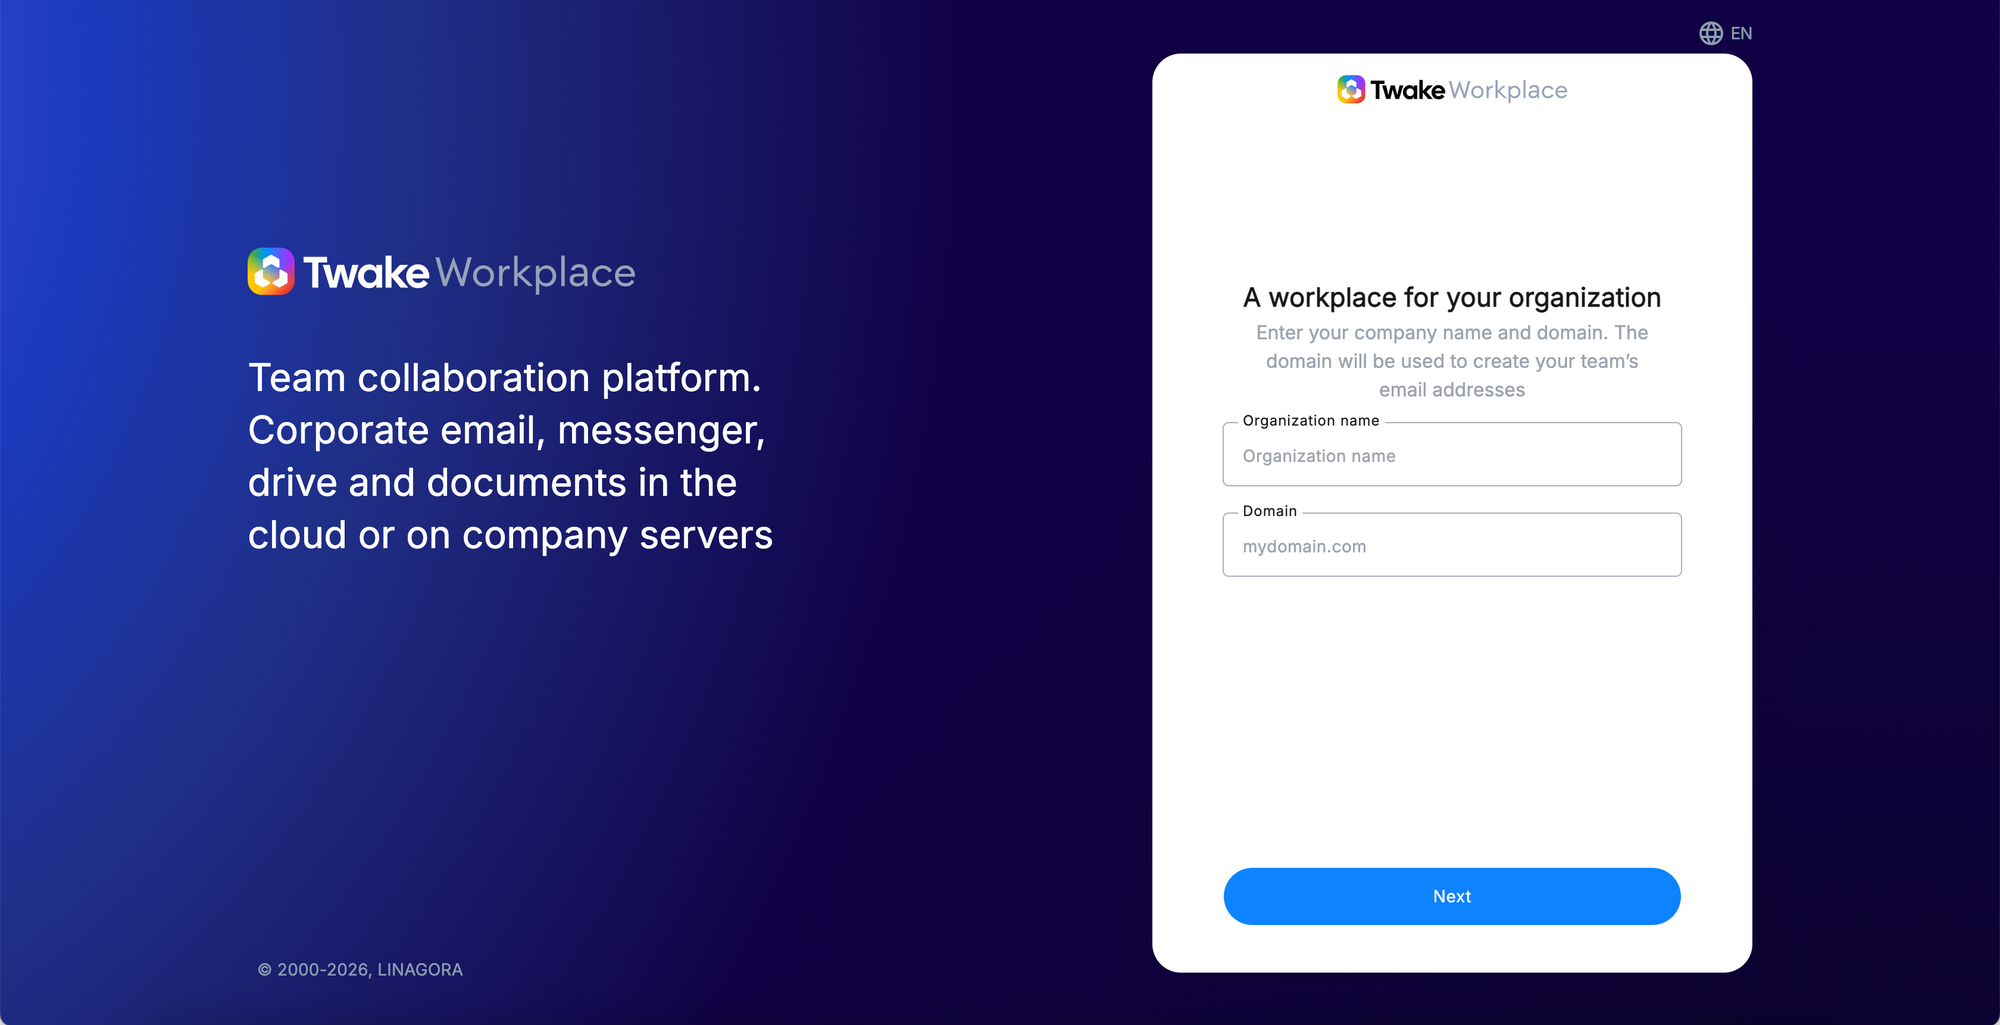
Step 2 — Set up the organisation
Fill in your organisation's details:
- Organisation name — the display name of your company workspace.
- Organisation domain — the domain that will be used to build your members' email addresses and their Matrix ID for Twake Chat.
Step 3 — Create your Owner account
After setting up the organisation, you create your professional (Owner) account — a separate account from your personal Twake account, dedicated to this organisation.
If you use a different phone number from your personal account, you'll be asked to validate it via SMS verification.
Frequently asked questions
Do I need an existing Twake account to create an organisation?
Yes. You must have a personal Twake account on twake.app before proceeding.
Can I create more than one organisation?
Your personal account can be used to create multiple organisations. However, each Owner account is linked to one organisation only.
Can I change the Owner after creation?
Yes. You can submit an ownership transfer request from the Business dashboard. See Changing a member's role.