
Adding a member to your organisation
Overview
As an Owner or Administrator, you create member accounts directly from the Business dashboard. A subscription must be active and your business domain must be verified before you can add members.
Step 1 — Create the member
1. Go to Users and click Create.
2. Fill in the required fields: First name, Last name, Twake mail / Chat ID (e.g. pierre@yourcompany.com), and Role (defaults to Member).
3. Optionally add a phone number or email, then click Save.
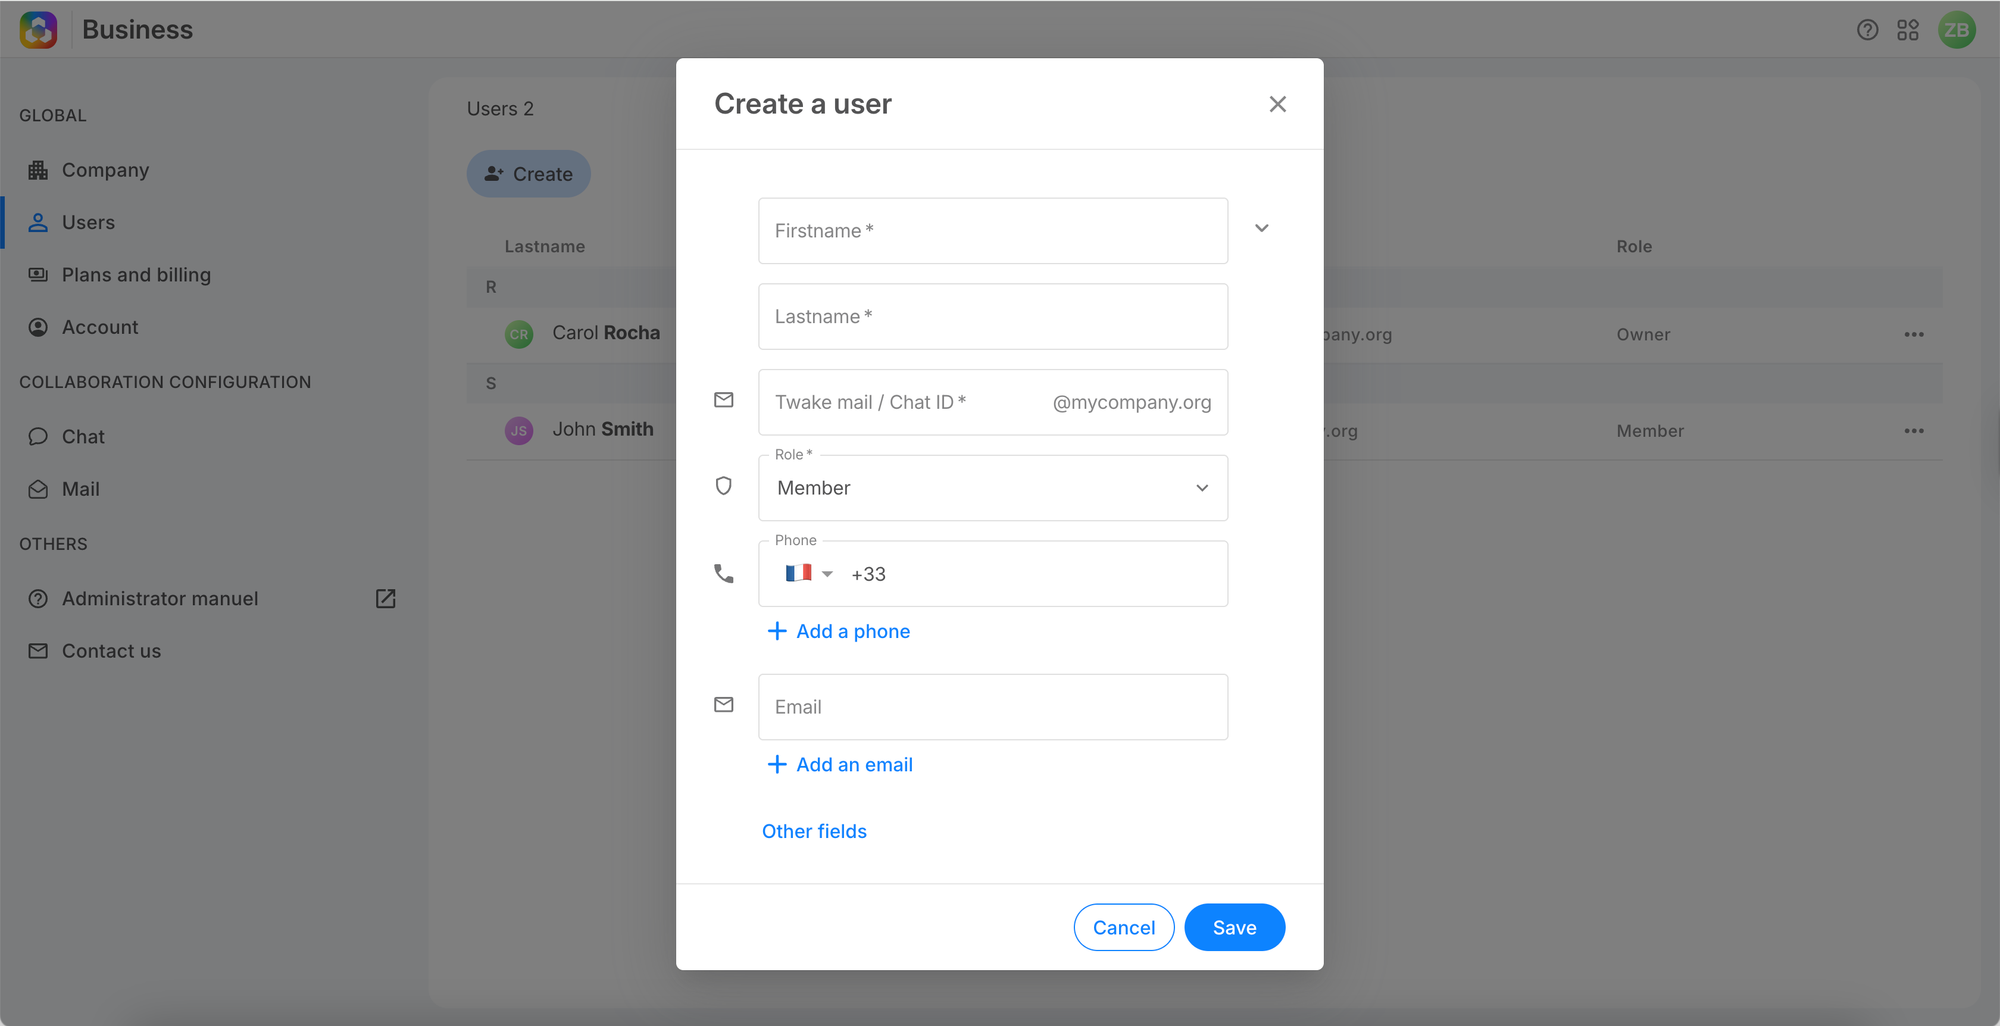
💡
The Twake mail / Chat ID must be unique. If already taken, try a variation (e.g. add an initial or department prefix).
Step 2 — The member accepts the invitation
The new member appears with the status Member, Invited. An invitation email is automatically sent with an activation link.
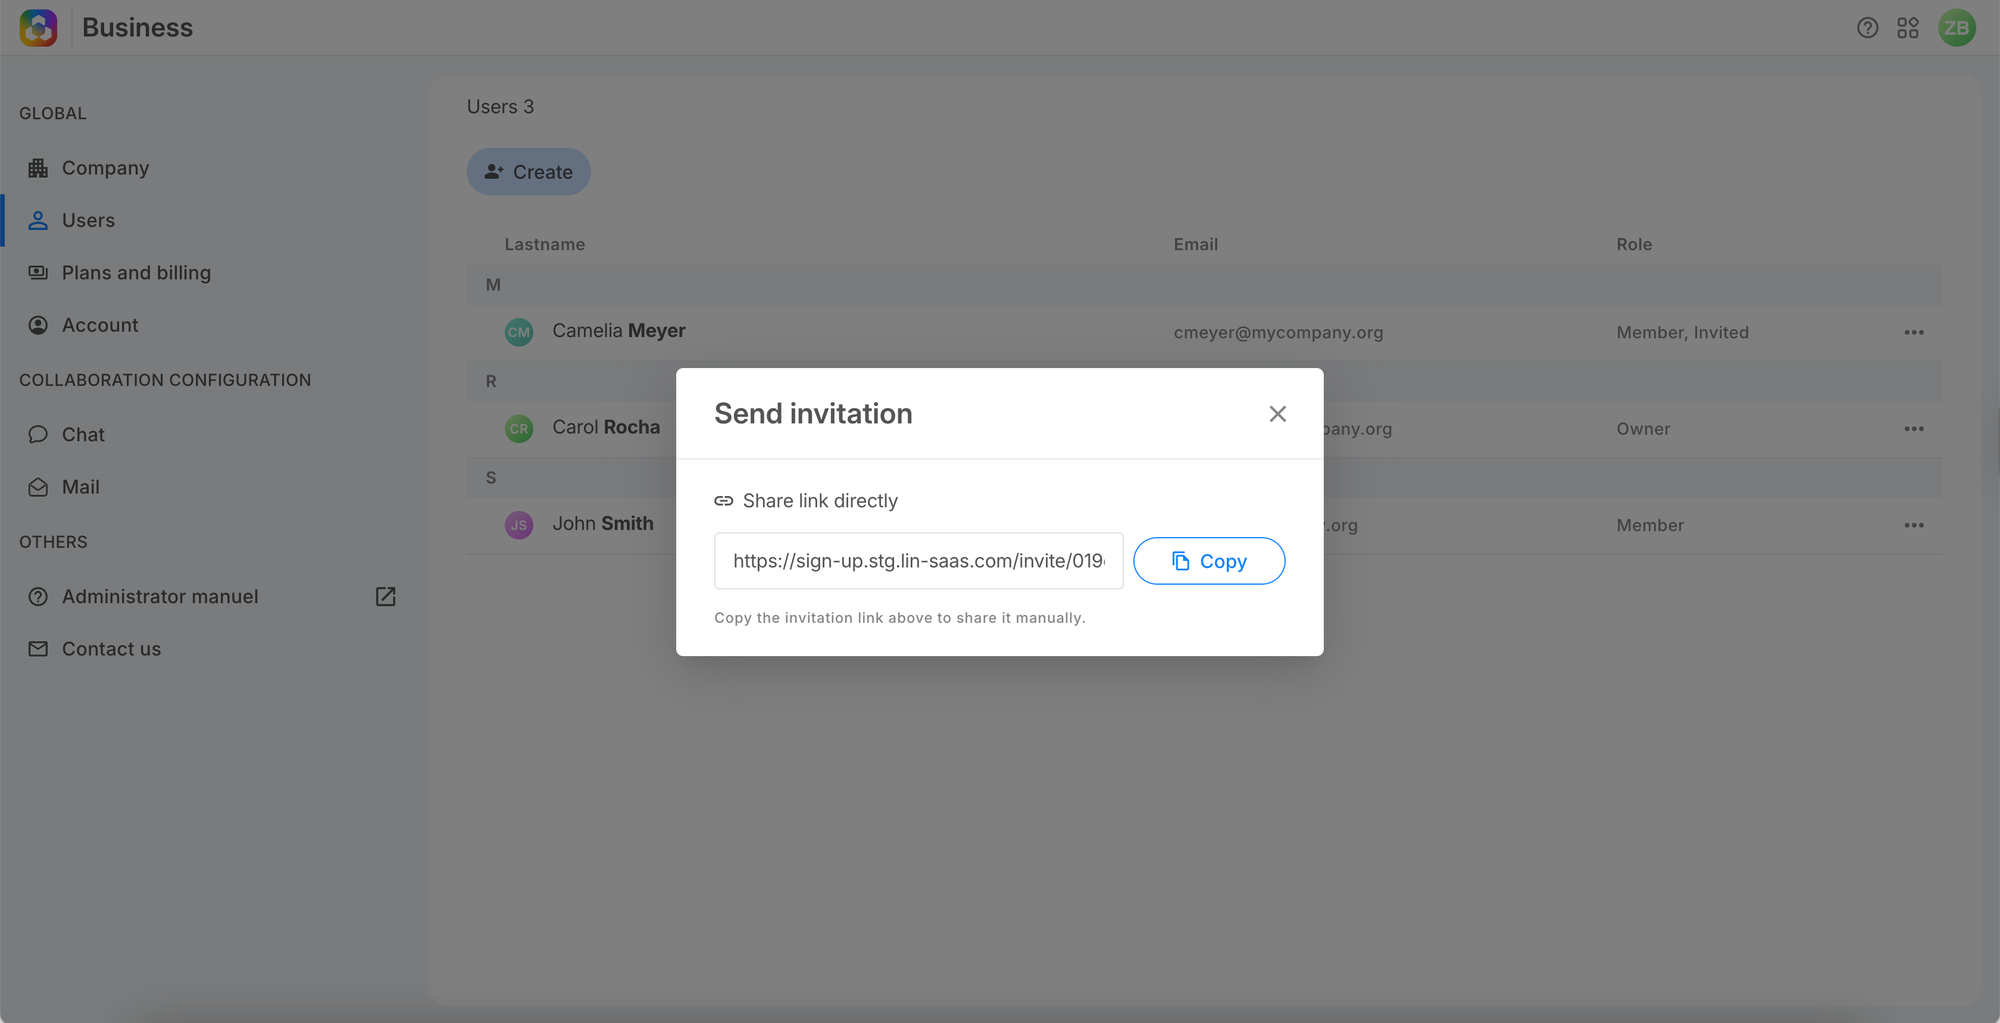
When they click the link, the member sets their password and accesses their Twake Workplace.
💡
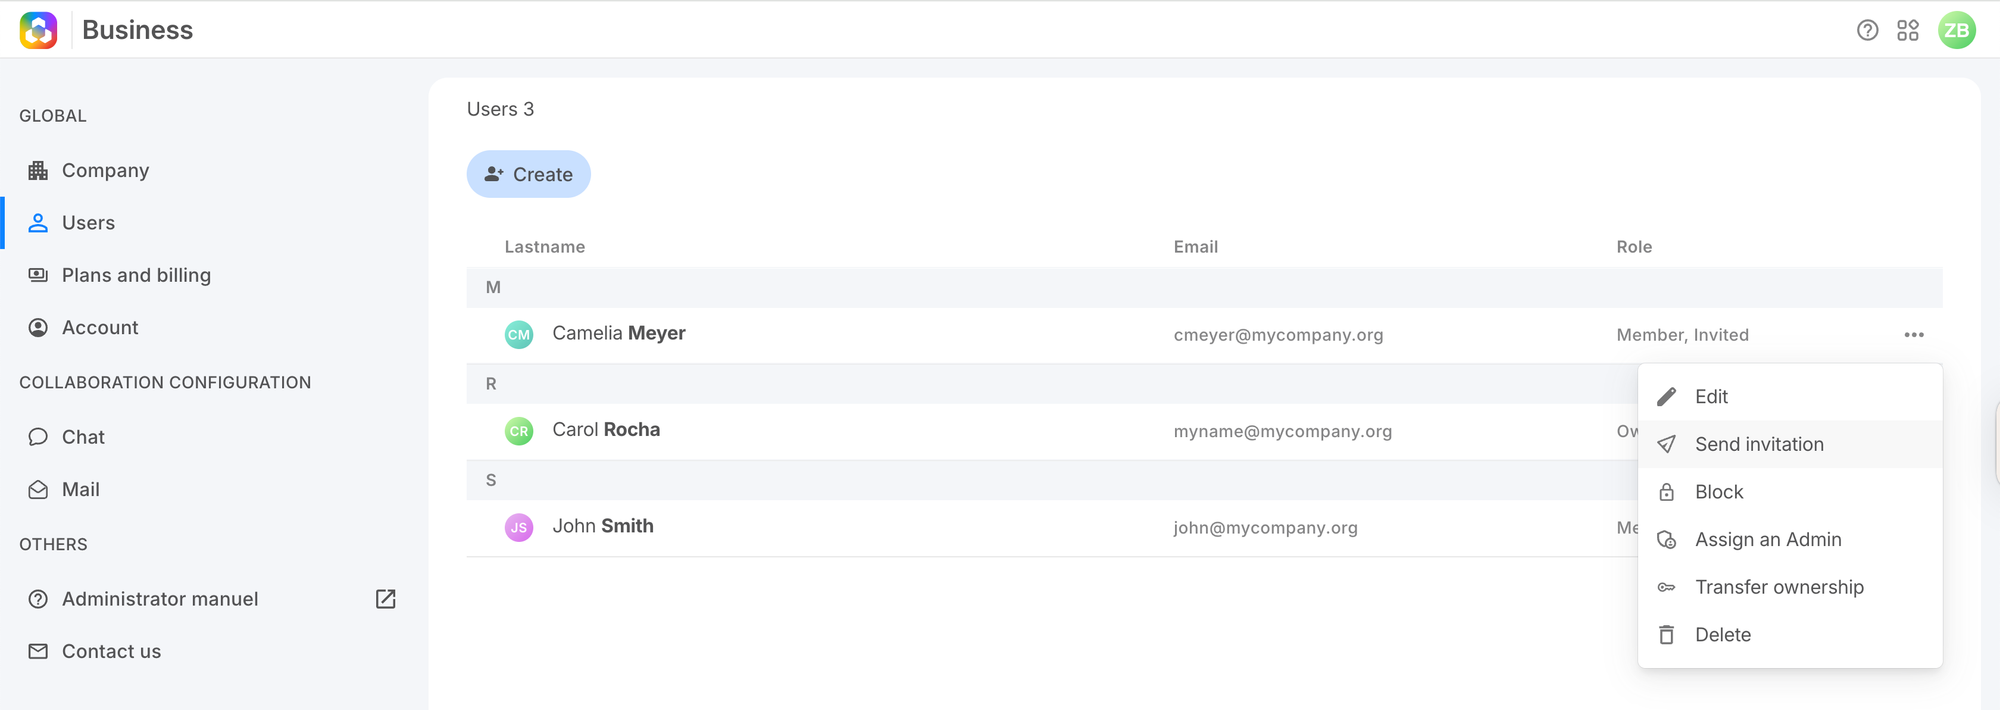
If the member doesn't receive the email, check spam. You can resend via ⋯ → Resend invitation.
Frequently asked questions
How long is the invitation valid?
7 days. You can resend a new one at any time.
Can the member change their Twake ID later?
No. The Twake mail / Chat ID is permanent once created.